

Creative Decorating - Holiday Edition - Volume 5
Welcome to Creative Decorating - Holiday Edition Vol.5! Honestly, I don't know how many more I'll do but I still have lots to share with you.
Today I'll give you some helpful tips on how you can creatively hang your Christmas stockings and your Christmas socks on display. I will also show you how to make yet another centerpiece and how to decorate your dining room chairs this holiday season.

If you want a temporarily different look for your dining room chairs, but don't really want to dress them in slipcovers, adorn them with plain mini wreaths. Take a beautiful ribbon and tie a wreath to each chair by making a neat-looking knot. If you prefer a bow, make a nice bow instead.

Attach the mini wreaths to the back of the chairs that will be occupied by you and guests. If you know not all the chairs will be occupied, attach the wreaths to the front of those chairs (to face the table) so you and your guests have a lovely view to enjoy.

Not necessarily a very festive look here but a cozy and casual table while you wait for Christmas. To create this beautiful natural centerpiece you will need:
- large clear flower vase (large bowl OK too)
- hazelnuts, 1 pound (aka filberts)
- giant, huge pinecone (craft store; mine from thrift store)
For a table runner I used an infinity wool shawl. I saw it to be very fitting here - the color palette and wool texture was just perfect to complete the look of cozy, homey and winter-like. At least in the Midwestern region of the USA.

If you like, you can go ahead and add a mini wreath on top of the vase to be even more creative with the centerpiece. It will match the wreaths tied to the chairs.

One creative way to display your Christmas stockings is to hang them on a wall. Here, I used a curtain rod (gunmetal-pewter color with modern, minimal-detail finials) and suspended it on a fishing line by its ends. The lines are invisible and it appears the rod is floating. (For more details on hanging the rod without use of brackets see my Instagram post with this rod and a Fall wreath in October.)

It just occurred to me that my MERRY CHRISTMAS sign is off center. Sorry about that! Been looking back and forth at hundreds of photos I took to select only a few for this post. Tired eyes.
The MERRY CHRISTMAS sign is my own DIY. I made it two years ago. But I can quickly tell you how I made it if you love it and want to have something very very similar to mine! I used a pair of black jeans which I decided in a split second that they were dated and it was time to repurpose them into something prettier to look at. (My other half thought, he wanted to keep his old jeans just in case they come back in style... maybe in 10 years. Nah. Another no-way-Jose!)

This is 1 leg cut from the knee down. Inside, for support, I inserted a flap from a thick cardboard box. I stitched both ends using a sewing machine. To decorate the top, I used a fabric remnant I had laying around in my crate of scrap fabrics for when I have sewing ideas. This fabric is oatmeal-color linen with silver-thread pinstripes. I sewed it on top, stitching through cardboard and all, along the perimeter.

Finally, I used the letters I had bought from a craft store (plain) and spray-painted them in silver. I attached the letters to the fabric with a hot glue gun. The sign is attached to the wall with 2 very fine nails in the top corners (almost invisible).
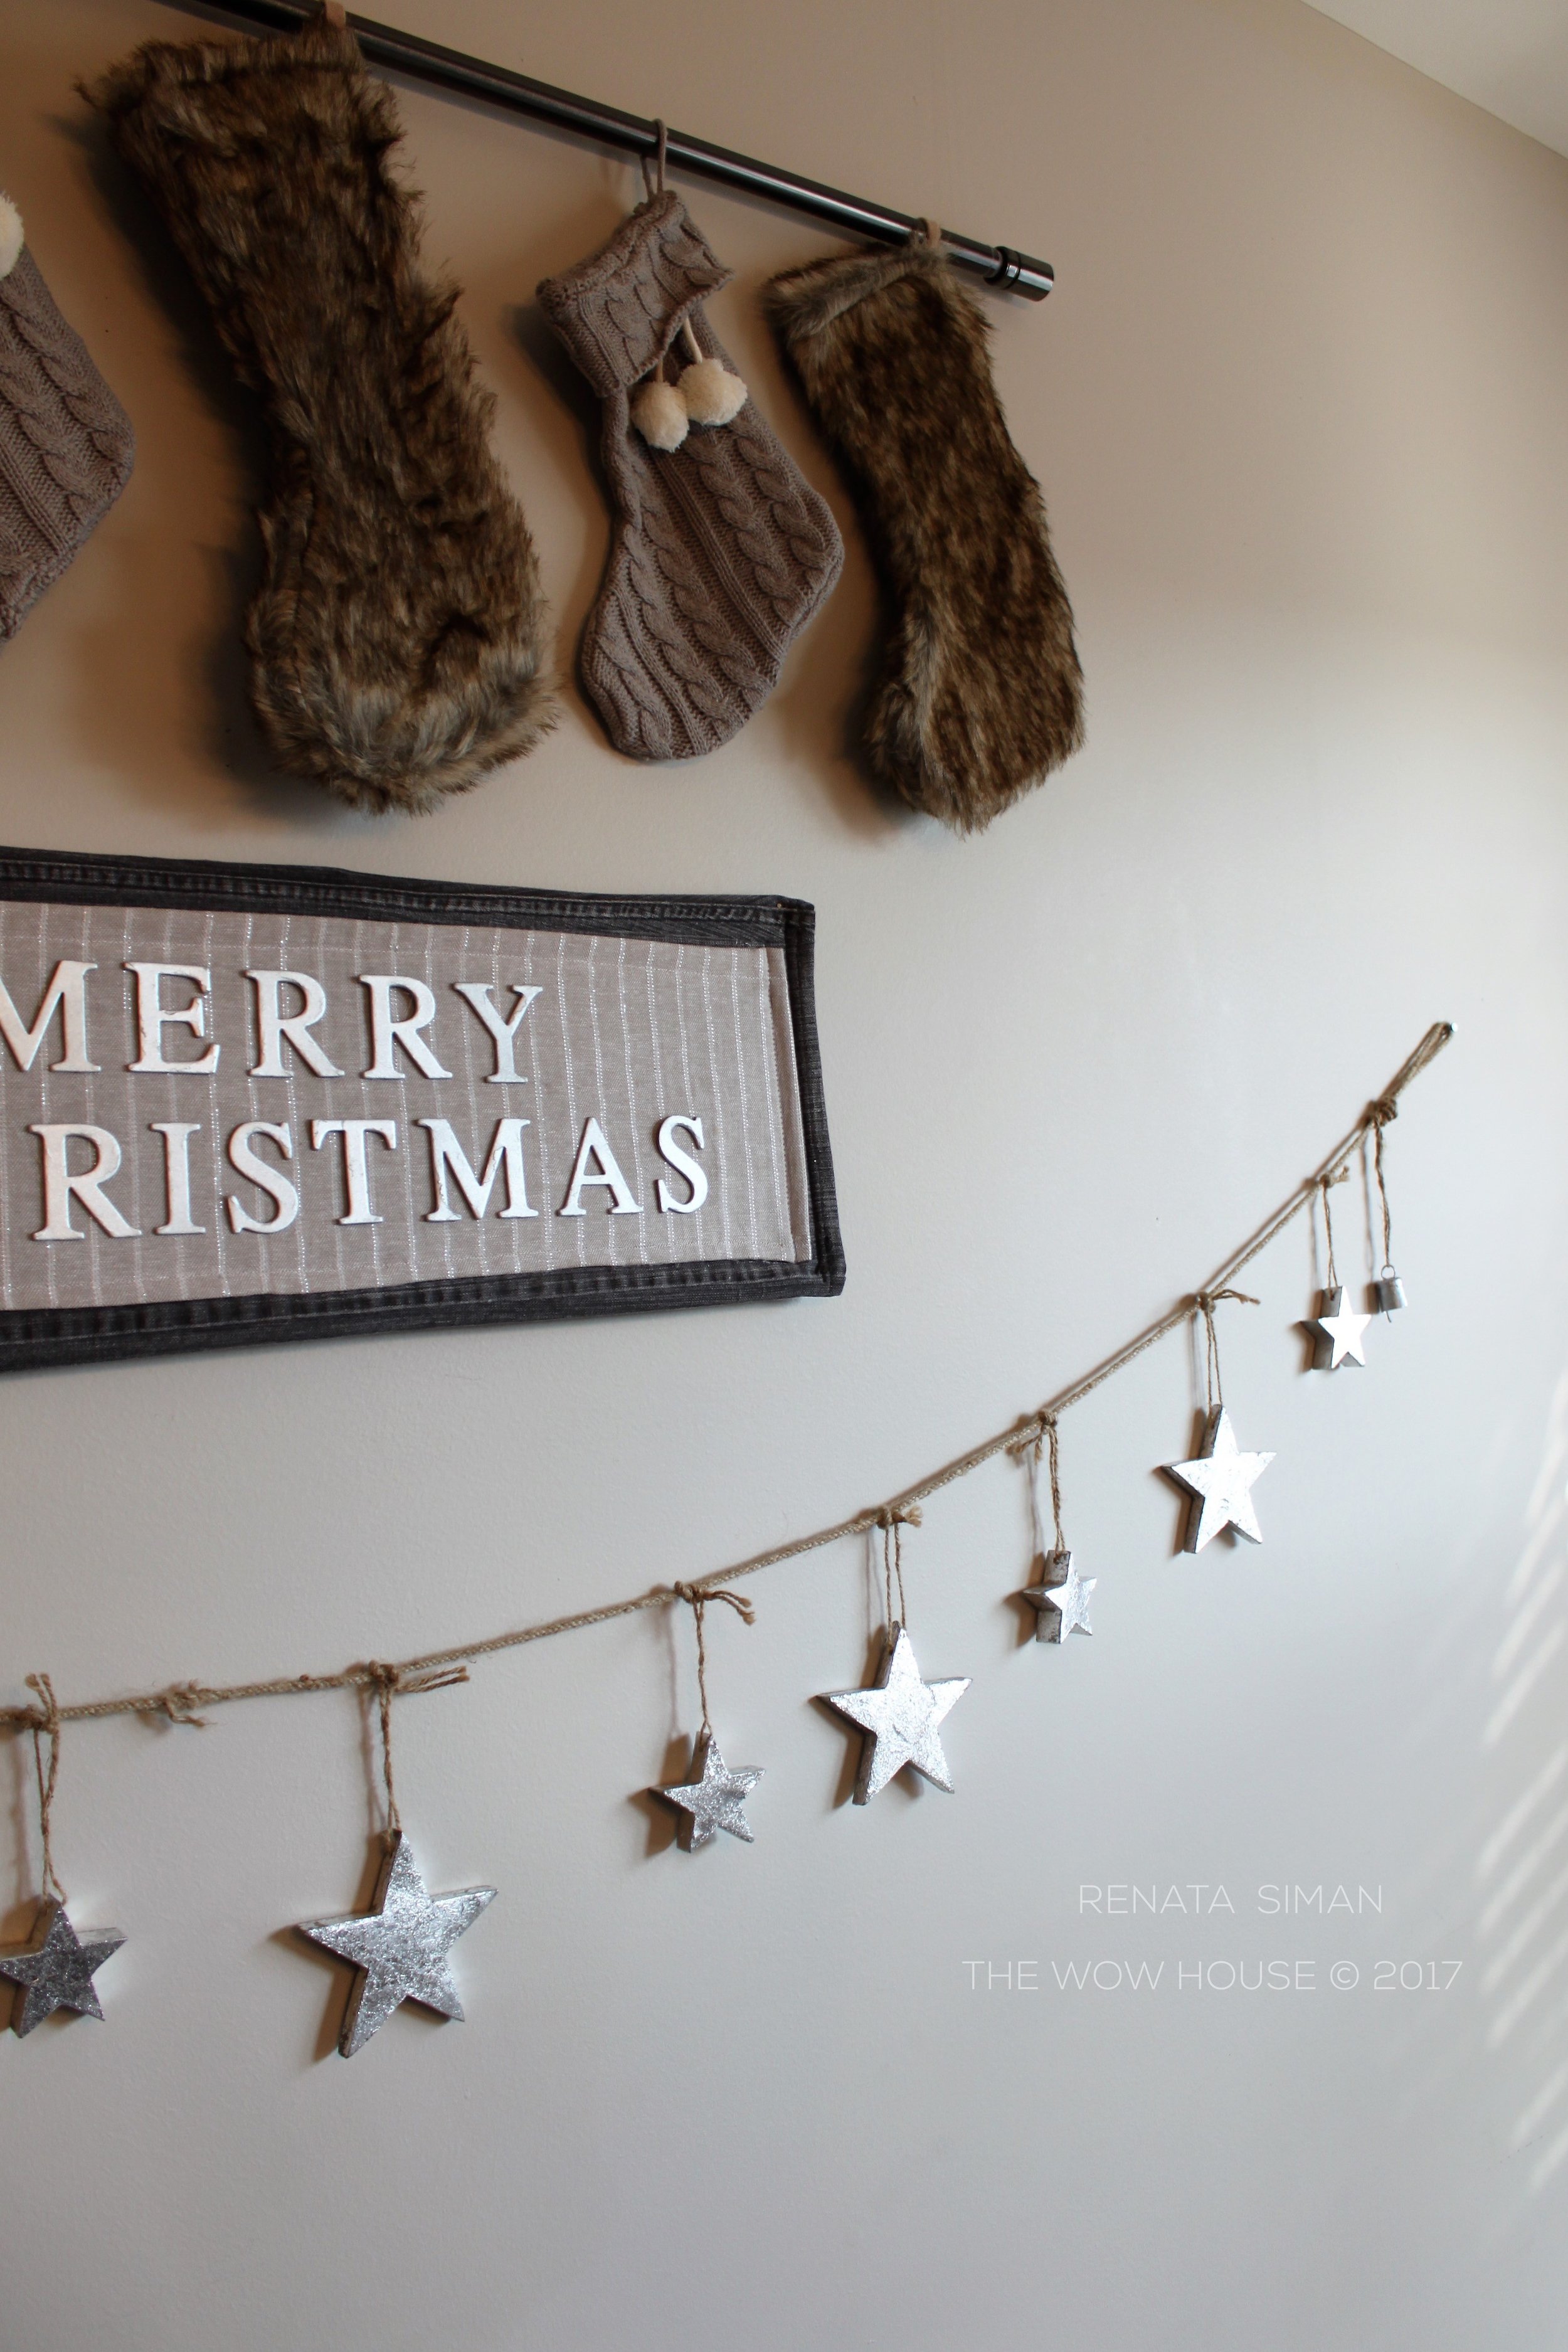
The star garland is store-bought. I love finding seasonal decor on clearance after a holiday has passed. Sometimes the hardest part is having to wait a whole year to display it when you find it after the holiday.

To avoid damaging your walls when decorating, try to use the thinnest possible nails, if you must hammer. I know, the advertised alternative is to use the sticky hooks instead, but I don't like them either. A lot of times I want my decor NOT to show any supportive hardware at all, and truth is those sticky hooks are NOT invisible. In fact, they show and that's ugly! So I resort to pushpins and thumbtacks. Way better.
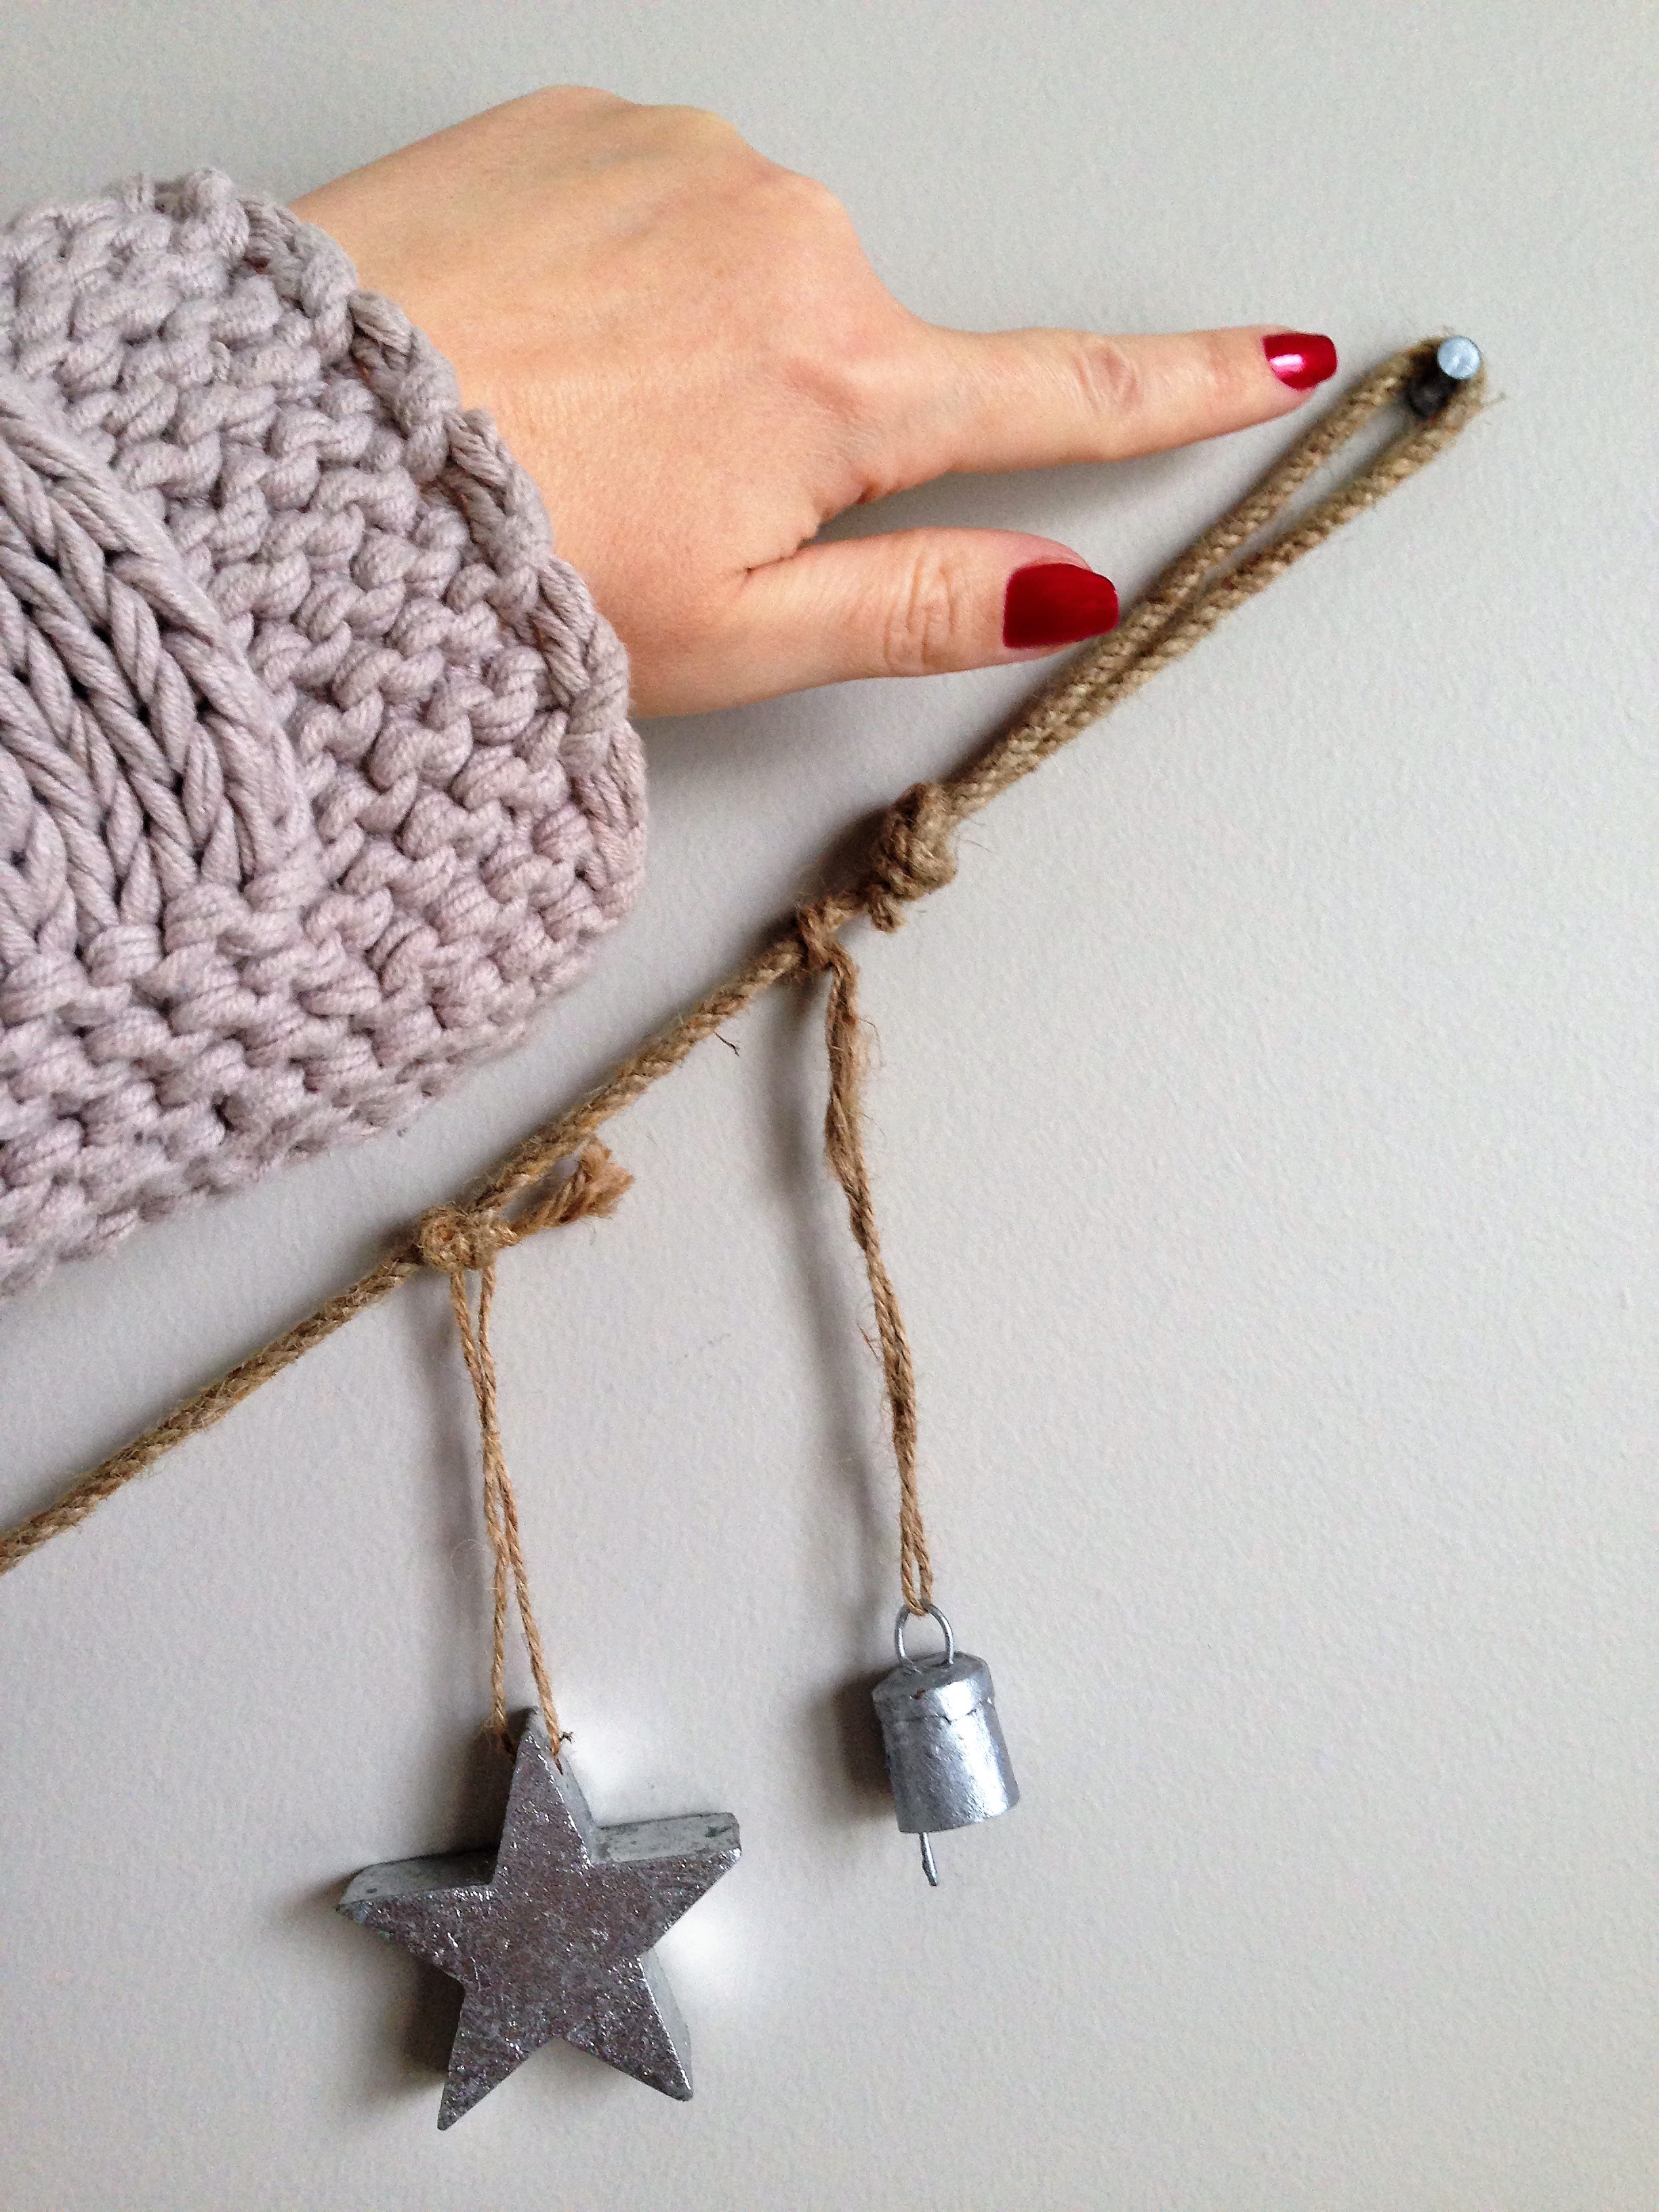
It's very easy to change the color of pushpins to match your decor or the color of the wall. Spray paint them in seconds!

I had silver spray so I went with that to match the decor of the garland.
This is not a bulletin board, so multi-color pushpins are not gonna cut it! LOL

And finally, the Christmas socks! These are minis, the size of an average hand. Many times you see people just hanging them up on The Tree, and that's very cute. But let me show you how you can hang them to display on a wall or below the fireplace mantel, if you have a fireplace.

I had an idea of using a thick branch I had in the garage. One of my kids just loves to bring things home from outside. I hung this branch, again, using the fishing line because it would look almost invisible. I love the look of a floating tree branch. No damage to the wall!

This is the top of the ledge of a window opening (without glass) that looks out the kitchen into the living room.
Push the pushpin half-way into the wood on the ledge. Attach the branch by the fishing line by making a double knot onto the needle of the pushpin. Once your knot is secured, push the pin in all the way down. Trim off the end of the fishing line that's sticking out. Done!
I hope you find these ideas inspirational. Get creative and decorate your home for your enjoyment! And to impress your guests. Till next time, guys!
Renata

